bathroom plumbing rough in dimensions pdf
Planning a bathroom remodel? Get the essential rough-in dimensions you need! Download our FREE PDF guide & avoid costly mistakes. Easy to understand & use!
Bathroom Plumbing Rough-In Dimensions: A Comprehensive Guide
Navigating bathroom renovations requires precise plumbing rough-in dimensions, often detailed in downloadable PDF guides. These resources ensure accurate pipe placement and prevent costly errors during installation.
Understanding the Rough-In Phase
The rough-in phase represents the critical pre-installation stage of bathroom plumbing, occurring before wall and flooring completion. This involves meticulously planning and installing drain pipes, water supply lines, and ventilation – essentially, the skeletal framework for future fixtures. PDF guides detailing bathroom plumbing rough-in dimensions are invaluable during this period, providing precise measurements for optimal fixture placement.
Successfully completing the rough-in means avoiding costly rework later. It’s about accurately marking fixture centerlines, establishing correct drain heights, and ensuring adequate clearances. These PDF resources often include diagrams and checklists, simplifying the process and minimizing potential errors. Proper execution during this phase guarantees efficient water flow and drainage, setting the foundation for a functional and aesthetically pleasing bathroom.
Importance of Code Compliance (NSW)
Adhering to New South Wales (NSW) plumbing codes is paramount during the rough-in phase, ensuring safety, functionality, and legal compliance. These regulations dictate specific requirements for pipe sizing, drainage slopes, venting, and fixture clearances. PDF guides specifically referencing NSW plumbing codes are essential resources for plumbers and homeowners alike.
Non-compliance can lead to failed inspections, costly rectification work, and potential health hazards. Utilizing PDF documentation detailing approved materials and installation techniques is crucial. NSW codes prioritize water conservation and hygiene, influencing drain placement and water supply line configurations. Always consult the latest version of the relevant PDF guides and local council regulations to guarantee a compliant and trouble-free bathroom installation.
General Rough-In Timing & Definition
The “rough-in” stage of bathroom plumbing occurs before wall and floor coverings are installed, typically after framing and electrical work are complete. It involves installing drain pipes, vent stacks, and water supply lines up to the fixture locations, without the fixtures themselves. PDF guides often illustrate this pre-installation process.
This phase is critical for accurate fixture placement and proper drainage. Detailed PDF documentation outlining dimensions and clearances is invaluable. Timing is key; completing the rough-in before finishes allows for easy access and corrections. A successful rough-in prevents costly rework later. Referencing a comprehensive PDF resource ensures all plumbing components are positioned correctly, setting a solid foundation for the finished bathroom.

Key Dimensions for Common Bathroom Fixtures
Detailed bathroom fixture dimensions are crucial for a successful rough-in; PDF guides provide essential measurements for sinks, toilets, and showers, ensuring proper installation.
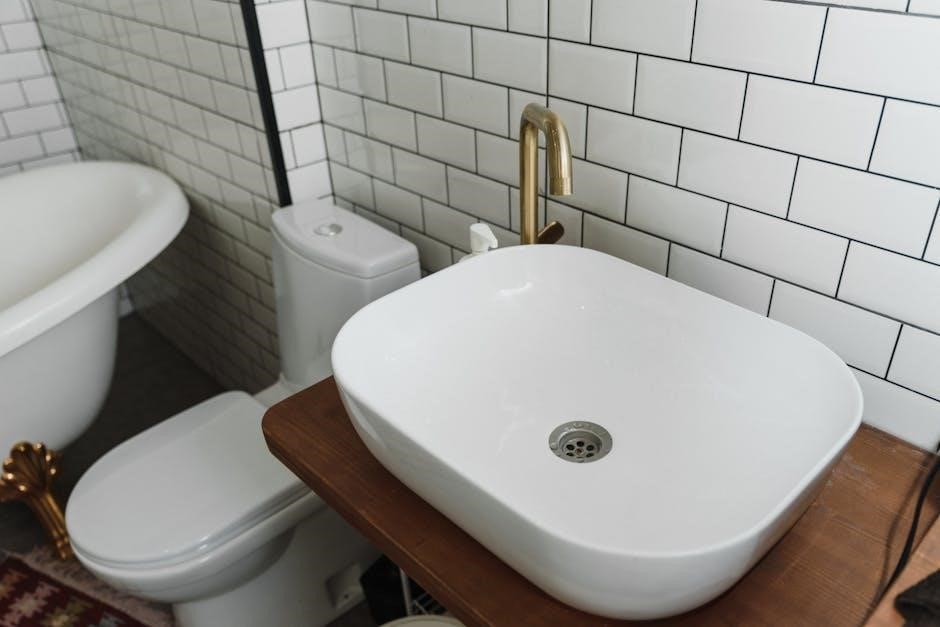
Bathroom Sink Rough-In Dimensions
Accurate bathroom sink rough-in is vital for a functional and aesthetically pleasing installation. Comprehensive PDF guides detail critical dimensions, typically specifying a drain height between 18 and 20 inches from the finished floor. Water supply lines are generally positioned 22 to 24 inches above the floor, allowing sufficient space for connections and future access.
These measurements account for standard sink bowl depths and faucet reach. Variations exist based on sink style (vessel, undermount, etc.), so consulting specific fixture specifications within the PDF is essential. Proper planning prevents costly adjustments later. Precise centerline marking, as illustrated in many guides, ensures alignment with cabinetry and surrounding features. Remember to verify local plumbing codes alongside the PDF recommendations.
Drain Height for Bathroom Sinks
Determining the correct drain height is a cornerstone of bathroom sink rough-in, often detailed in accessible PDF guides. Standard drain heights typically fall within the 18-20 inch range, measured from the finished floor to the top of the drainpipe; However, this can fluctuate based on the sink’s design – vessel sinks, for example, require adjusted heights.
PDF resources often illustrate this with clear diagrams. Incorrect drain height can lead to improper drainage or necessitate complex modifications. Always cross-reference the PDF’s recommendations with the specific sink model’s specifications. Precise measurement and adherence to code are crucial. Consider the trap’s height when calculating the overall drain assembly’s position, as shown in many plumbing PDFs.
Water Supply Line Height for Bathroom Sinks
Accurate water supply line height is vital during bathroom sink rough-in, and detailed PDF guides are invaluable resources. Typically, these lines are positioned approximately 21-24 inches above the finished floor. This allows for easy connection to the faucet and shut-off valves. PDF documents frequently showcase diagrams illustrating optimal placement.
Consulting a PDF guide ensures compliance with local plumbing codes. Variations may occur depending on the sink type and faucet design. Ensure sufficient clearance for future maintenance and repairs. Incorrect height can lead to installation difficulties and potential leaks. Always verify measurements with the sink’s manufacturer specifications, often found within accompanying PDF documentation, for a seamless installation.
Toilet Rough-In Dimensions
Precise toilet rough-in dimensions are crucial for a successful installation, and comprehensive PDF guides are essential tools. These guides detail the toilet flange height and the distance from the finished wall to the flange’s center. Standard rough-in distances are typically 10, 12, or 14 inches, clearly illustrated in PDF diagrams.
Utilizing a PDF resource ensures adherence to plumbing codes and prevents costly adjustments. The flange height should be level with the finished floor. Incorrect measurements can lead to rocking or instability. Always cross-reference the PDF specifications with the toilet’s manufacturer’s instructions for optimal results and a secure, leak-proof connection. Proper planning, aided by these guides, is key.
Toilet Flange Height
Determining the correct toilet flange height is paramount, and detailed PDF guides provide essential specifications. Typically, the top of the toilet flange should be flush – level – with the finished floor. This ensures a stable and secure toilet installation, preventing rocking or leaks. PDF resources often illustrate this critical detail with clear diagrams.
Consulting a PDF guide helps avoid common installation errors. Incorrect flange height can necessitate shims or adjustments, adding complexity and potential failure points. Precise measurements, as outlined in these guides, are vital. Always verify local plumbing codes referenced within the PDF for specific height requirements. A properly installed flange is the foundation of a reliable toilet system.
Distance from Finished Wall to Center of Toilet Flange
Accurate measurement of the distance from the finished wall to the toilet flange center is crucial, and PDF guides offer standardized recommendations. The standard distance is generally 12 inches, though variations exist based on building codes and fixture choices. PDF documentation frequently includes detailed diagrams illustrating this measurement.
Utilizing a PDF resource ensures compliance and prevents future issues. Incorrect placement can lead to cramped spaces or difficulty installing the toilet. Always double-check local plumbing codes within the PDF, as they may supersede general guidelines. Precise measurements, as detailed in these guides, are essential for a comfortable and functional bathroom layout. Proper planning, aided by a PDF, avoids costly renovations.
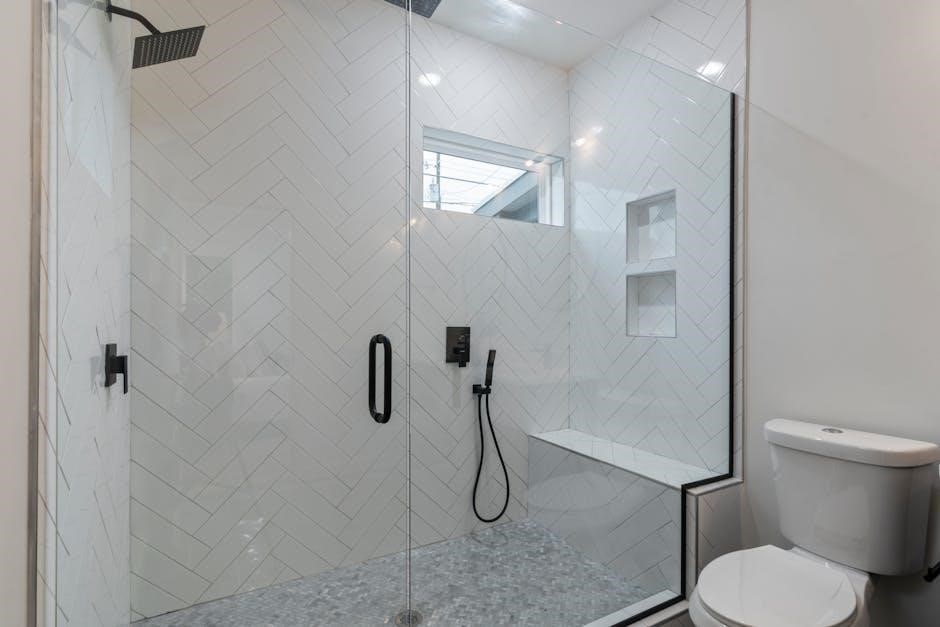
Shower/Tub Rough-In Dimensions
Shower and tub rough-in dimensions are meticulously detailed in comprehensive PDF guides, ensuring proper drainage and functionality. These PDF resources outline specific requirements for drain placement, considering shower size and tub type. Accurate positioning prevents water pooling and potential damage.
A PDF will typically specify drain locations and overflow heights for tubs. Shower drain placement varies, but PDFs often recommend centering the drain within the shower base. Consulting a PDF guide is vital for code compliance and a watertight installation. Proper rough-in, guided by these documents, avoids costly rework and ensures a relaxing bathing experience. Always prioritize the information within the PDF for accuracy.
Shower Drain Placement
Detailed PDF guides on bathroom plumbing rough-ins emphasize precise shower drain placement for effective water removal. These documents typically recommend centering the drain within the shower base, though variations exist based on shower size and shape. PDFs often illustrate optimal positioning to prevent water accumulation and ensure proper slope towards the drain.
Consulting a PDF is crucial for understanding local code requirements regarding drain placement. The PDF will specify acceptable distances from walls and the shower enclosure. Incorrect placement can lead to drainage issues and potential water damage. Always refer to the PDF’s diagrams and measurements for accurate installation, guaranteeing a functional and watertight shower system. Prioritize the PDF’s guidance for a successful outcome.
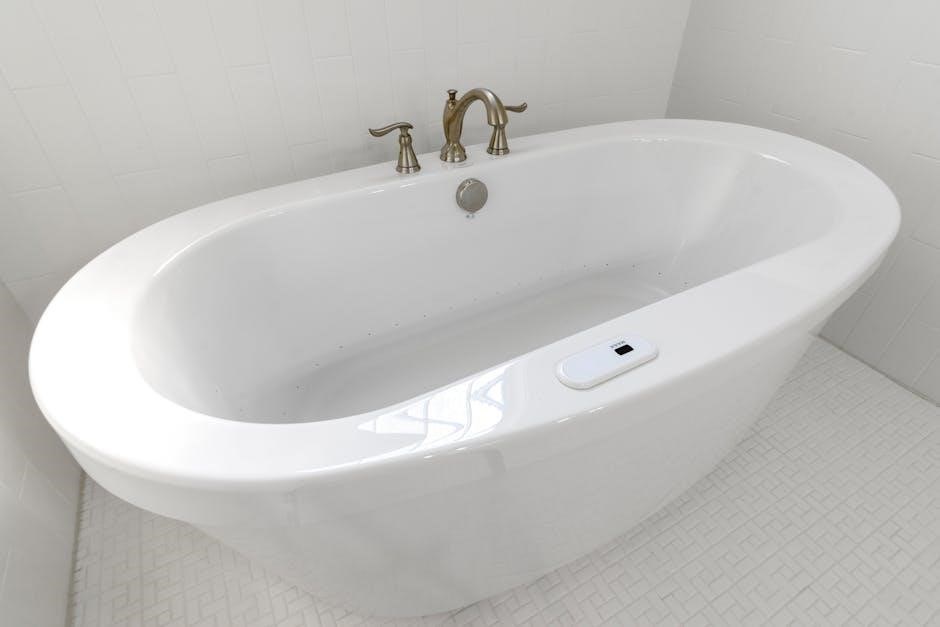
Tub Drain Placement & Overflow Height
Bathroom plumbing rough-in PDF guides meticulously detail tub drain placement and overflow height for optimal functionality. These PDFs typically specify the drain’s location relative to the tub’s finished dimensions, ensuring proper water evacuation. PDFs emphasize the importance of aligning the overflow drain with the desired water level, preventing spills and maintaining a comfortable bathing experience.
Accurate overflow height, as detailed in the PDF, is critical for preventing water damage. PDFs illustrate the correct vertical distance between the tub drain and the overflow, adhering to plumbing codes. Always consult the PDF’s diagrams for precise measurements. Ignoring these guidelines can lead to inefficient drainage or overflow issues. Prioritize the PDF’s instructions for a secure and enjoyable bathtub installation.

Drainage, Venting & Water Line Considerations
Bathroom plumbing rough-in PDFs highlight proper drainage slopes, vent pipe sizing, and water line materials. These details ensure efficient waste removal and water supply;
Drainage Slope Requirements
Detailed bathroom plumbing rough-in PDF guides consistently emphasize the critical importance of adequate drainage slope. Maintaining a consistent downward pitch in drain lines is paramount for effective wastewater removal and preventing blockages. Generally, a minimum slope of ¼ inch per foot is recommended for 1 ½ inch diameter drain pipes, a standard size for bathroom fixtures.
This slope ensures gravity assists in carrying waste towards the main drain line. Insufficient slope can lead to solids settling, causing clogs and potential backups. Conversely, excessively steep slopes might allow solids to flow too quickly, potentially leaving debris behind. PDF resources often include diagrams illustrating correct slope angles and pipe routing for various fixture configurations, aiding installers in achieving optimal performance and code compliance.
Venting Pipe Sizing & Placement

Comprehensive bathroom plumbing rough-in PDF guides dedicate significant attention to proper vent pipe sizing and strategic placement. Vent pipes are crucial for maintaining atmospheric pressure within the drainage system, preventing siphoning of water from traps and ensuring smooth wastewater flow. The diameter of vent pipes must correspond to the size of the connected drain lines, typically 1 ½ inches for standard bathroom fixtures.

PDF documentation illustrates how vent pipes should terminate above the roofline, away from windows and air intakes, to prevent sewer gases from re-entering the building. Proper placement also considers the distance from the trap to the vent, adhering to code requirements. Incorrectly sized or positioned vents can lead to slow drains, gurgling sounds, and unpleasant odors, highlighting the importance of following PDF guidelines.
Water Supply Line Materials & Sizing
Detailed bathroom plumbing rough-in PDF guides thoroughly cover water supply line materials and appropriate sizing for optimal performance. Common materials include PEX, copper, and CPVC, each with its own advantages regarding cost, durability, and ease of installation. PDF resources often detail local code preferences for material usage.
Sizing is critical; typically, ½-inch lines suffice for bathroom sinks and toilets, while ¾-inch lines may be needed for showers or tubs. These PDF documents illustrate pressure loss calculations based on pipe length and fixture demand. Correct sizing ensures adequate water pressure at all fixtures. Ignoring these guidelines, as outlined in the PDF, can result in reduced flow and unsatisfactory fixture operation.

Planning & Avoiding Common Mistakes
Comprehensive bathroom plumbing PDF guides emphasize meticulous planning and centerline marking to prevent costly errors during rough-in. Careful review is essential!
Fixture Centerline Marking
Accurate fixture centerline marking is paramount during the bathroom plumbing rough-in phase, and detailed PDF guides often dedicate significant sections to this crucial step. These guides illustrate how to precisely locate the center of each fixture – sink, toilet, shower, or tub – on the floor and walls.
Using a consistent datum point is vital for accuracy. Marking these centerlines clearly with a pencil or marker ensures plumbers and other tradespeople understand the intended fixture placement. PDF resources frequently showcase techniques for transferring measurements from architectural plans to the physical space, minimizing discrepancies. Proper marking avoids future issues with alignment and accessibility, ultimately saving time and money during the final installation stages.
Clearances & Accessibility Requirements
Bathroom plumbing rough-in dimensions must adhere to strict clearances and accessibility standards, often comprehensively outlined in relevant PDF documents and local building codes. These guidelines dictate minimum spaces around fixtures for comfortable and safe use, particularly crucial for individuals with disabilities.

PDF guides detail required clearances in front of toilets, sinks, and showers, ensuring adequate maneuvering space. Accessibility standards, like those outlined in the National Construction Code (NCC) in Australia, specify grab bar placements and turning radii. Ignoring these requirements can lead to failed inspections and costly rework. Careful consideration of these factors during the rough-in phase, referencing detailed PDF resources, is essential for a compliant and user-friendly bathroom.
Common Rough-In Errors to Avoid
Numerous errors can plague bathroom plumbing rough-ins, often preventable with careful planning and referencing detailed PDF guides. Incorrect drain slope is a frequent issue, leading to blockages. Miscalculating fixture centerline locations, detailed in PDF schematics, results in improper alignment and aesthetic problems.
Failing to account for valve and fitting clearances is another common mistake, potentially requiring costly pipe modifications. Ignoring local code requirements, readily available in PDF format from governing bodies, can lead to failed inspections. Always double-check dimensions against PDF plans and prioritize accurate measurements. Thoroughly reviewing PDF documentation before commencing work minimizes rework and ensures a successful plumbing installation.

Resources & Documentation
Comprehensive PDF guides detailing bathroom plumbing rough-in dimensions are readily available online. Local plumbing codes and manufacturer specifications offer crucial guidance for compliant installations.
Locating Relevant PDF Guides
Finding accurate bathroom plumbing rough-in dimension PDF guides is crucial for successful renovations. Numerous online resources offer detailed diagrams and specifications from plumbing manufacturers and building code authorities. A quick web search using keywords like “bathroom rough-in guide PDF,” “plumbing rough-in dimensions,” or “NSW plumbing code PDF” will yield valuable results.
Many local government websites also host downloadable PDFs outlining specific plumbing requirements for your region. Additionally, professional plumbing associations often provide members-only access to comprehensive documentation. Remember to verify the guide’s date to ensure it reflects the latest code updates and industry best practices. Prioritize guides that clearly illustrate fixture placement, drain angles, and water supply line heights for common bathroom elements like sinks, toilets, and showers.
Importance of Local Plumbing Codes
Adhering to local plumbing codes is paramount during bathroom rough-in, and PDF guides often reference these regulations. Codes dictate minimum clearances, pipe sizing, drainage slopes, and fixture placement to ensure safety and functionality. Ignoring these rules can lead to failed inspections, costly rework, and potential health hazards.
NSW (New South Wales) plumbing codes, available as PDF downloads from relevant authorities, are particularly important for Sydney residents. These documents detail specific requirements for water supply, drainage, and venting systems. Always consult the latest version of your local code before commencing any plumbing work. Understanding these regulations, often found within detailed PDF documentation, guarantees a compliant and reliable bathroom plumbing system.